Regions and groups are how the call groups are setup inside RealWear Connect. A region can be specific to a user. If a user is assigned a region they will only see the call groups in that region (and the Global region)
If all call groups are assigned the ‘global region’ these can be seen by all users.
You do not have to use regions. You can place all groups in the Global region.
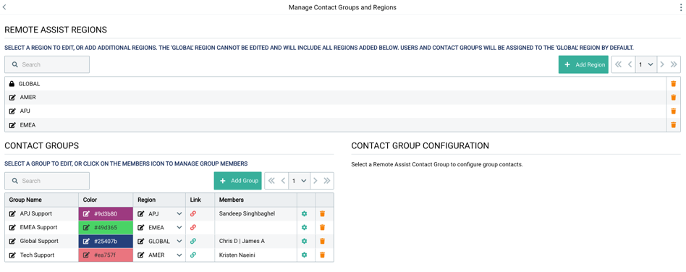
Below is a typical Region and contact group setup, you can see there are 3 additional regions to the GLOBAL region, these are AMER, APJ, EMEA.
There are then four contact groups APJ Support, EMEA Support, Global Support, Tech Support. These are assigned to different regions.
Adding a new region

Click the Add Region button and type into the top row the name of the region, click off the box to save it
Adding a new contact group

Click the add Group button
Enter the specified name of the group in the box, this will become an audio command on RealWear Cloud, it is best to use a multi-syllable word or 2-3 words Choose a colour for your group
Allocate a region (all users will be able to see the GLOBAL region group)
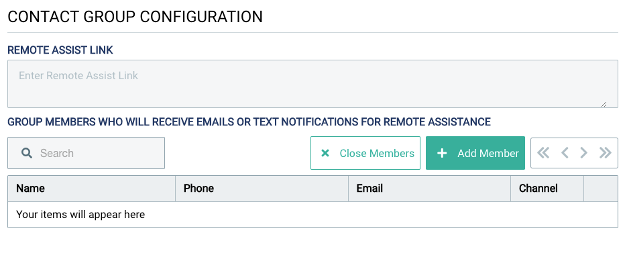
Now click the cog to add members and a remote assist link to the group
The remote assist link will be the permanent meeting link you want to use from Microsoft Teams. (This is covered in this article here)
Add members to a group
Here you will add a person to a group, add their contact details and how they will be contacted when a group is called.
- Click the add member button
- Enter their name in the new row
- Enter mobile phone number in international format +44, +1, +91 etc (ensure no spaces)
- Enter email address
- Choose how the group member should be contacted: Email, Text or both.
To create new groups and members you can repeat the steps above as many times as you need.
Learn about using RealWear Connect on a headset here
Learn about setting up RealWear Connect here
Learn about managing RealWear Connect users here
Learn about making Teams meeting links for RealWear Connect here