See Our Video Guide
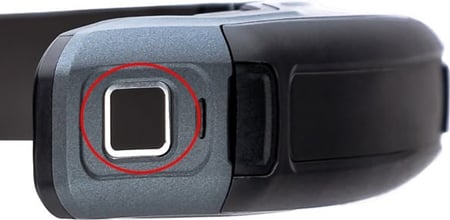
Power Button/Fingerprint Sensor
There is a button/fingerprint sensor on the front of the battery side of the device. This is used to unlock RealWear Navigator, power ON, power OFF, put into sleep mode, or wake from sleep.
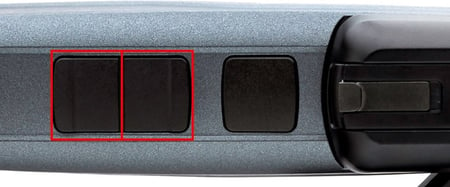
Action Button
The Action Button is the large, square button in between the camera and left/right buttons. A single tap serves as a failsafe method of returning you to your home screen. Three quick, consecutive taps on the Action Button will toggle the microphone array between front and back configurations.
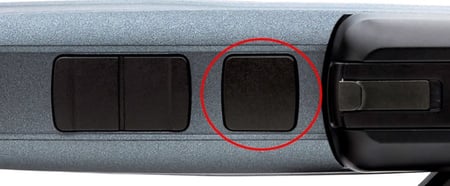
Left and Right Buttons
The left and right buttons next to the Action Button can be used to turn the volume on the RealWear Navigator up or down and can be used by developers for other functions.
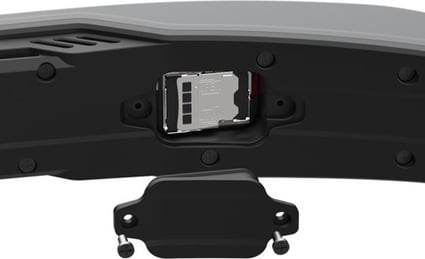
Micro SD Card Door
The micro SD card door on the inside of the RealWear Navigator band is opened with a 001 Phillips head screwdriver. Insert a FAT32 formatted micro SD card with a maximum capacity of 512 GB for portable storage.
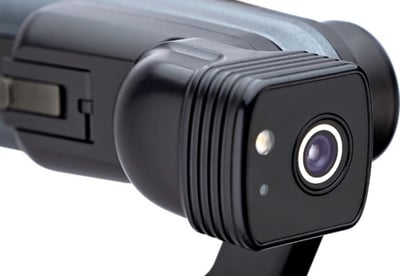
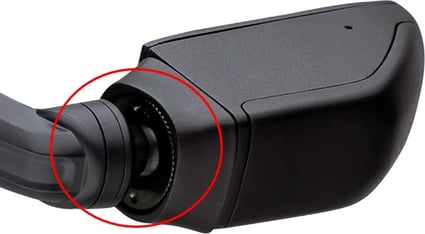
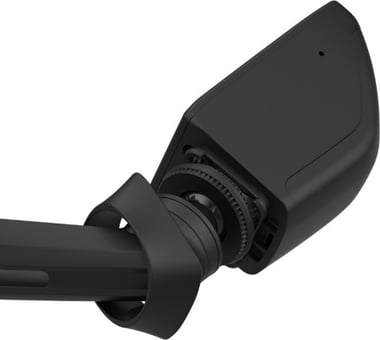
Swappable Camera
The swappable camera is located above the boom arm and can be pivoted up and down. It can capture images/photos up to 12MP photos and videos up to 1080p. It also includes a built-in flashlight that can be controlled with your voice.
Remove the Camera
IMPORTANT
Make sure a camera or camera cover is installed when operating RealWear Navigator. The device will not work without a RealWear-branded camera or camera cover installed.
To remove the camera, do the following:
- Push the camera latch forward.
- With the camera latch pushed forward, lift up on the camera tab.

- With the camera tab released, gently pull the camera away from the device.
Install the Camera
To install the camera, do the following:
- Align the camera female connector with the device male connector.
- Gently press the camera until the camera is flush with the device.
-
Press the camera tab down until it snaps securely into place.
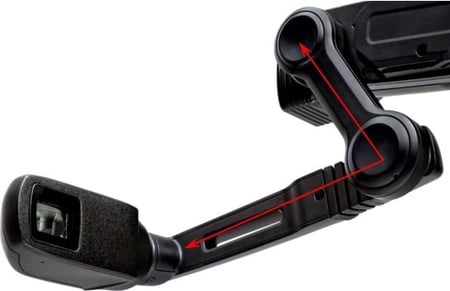
Boom Arm
The Boom Arm allows the user to adjust the positioning of the Display Pod and allows for 6 degrees of freedom, which means it can be adjusted up and down, left and right, and forward and back. It is comprised of a Shoulder, Elbow, and Wrist joint (imagine the human arm). Its orientation can be inverted to allow use by left or right eye dominant users.
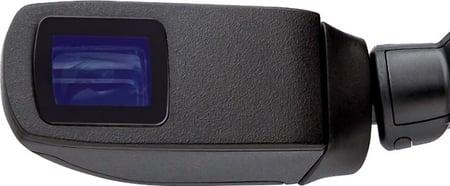
Display Pod
The display pod can be rotated and adjusted so the user can see the display clearly. The display is an 854 x 480p 24-bit color LCD display with 20° Field of View (FOV) and 1-meter focal depth.
Note: The display pod is upgradeable at an authorized RealWear Service Center.
Display Pod Pivot
The display pod can pivot in multiple directions to allow you to view the RealWear Navigator display from the angle you need.
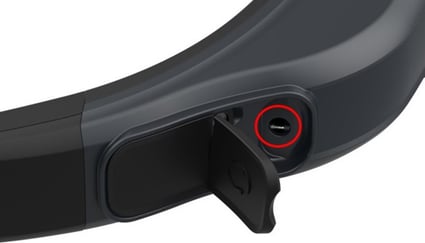
Tighten the Display Pod Pivot
Over time, the display pod pivot can lose tension and the display pod will not stay in a set position at the end of the boom arm.
To tighten the display pod pivot, do the following:
- Pull the pivot cover away from display pod.
- Turn the pivot knob clockwise to tighten.
- Align the pivot cover with the display pod.
Note: The pivot cover can only be installed if it is positioned correctly. Make sure the long edge of the pivot cover is aligned with the long edge of the display pod. - Gently press the pivot cover until the pivot cover is flush with the display pod.
Microphone Array
There are two sets of two microphones on RealWear Navigator. The Primary Microphones handle user input, while the reference microphones cancel external noise. The front microphones, active by default, are located on the display pod. The rear microphones are located on the side of the device opposite from the boom arm. These are used when issuing voice commands while the boom arm is out of your field of view.
Speakers
A 94dBA loudspeaker is located above each ear.
Battery
RealWear Navigator requires a rechargeable battery to function. The device ships with the battery uninstalled.
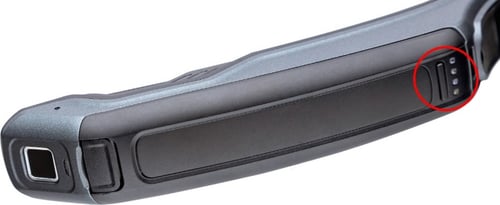
Press the battery button to check the battery charge level. The battery indicator lights illuminate white to show the battery charge level.
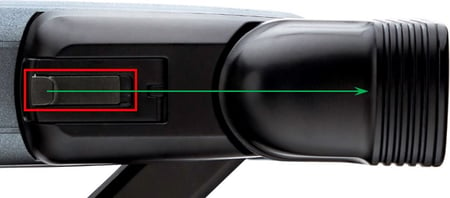
USB-C Port
For all charging and data transfer, you must use the USB-C port, which is located next to the battery compartment, beneath the rear flap on the side opposite the boom arm.
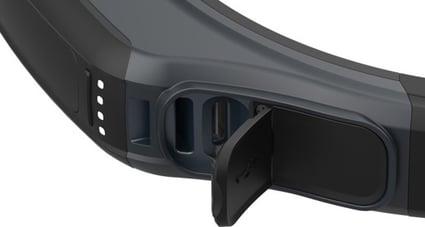
Auxiliary Jack
Headphones can be connected to RealWear Navigator using the 3.5mm headphone jack on the back of the RealWear Navigator, under the flap on the side of RealWear Navigator, on the opposite side from the USB-C charging port. We recommend using RealWear 33 dB noise-reduction earbuds with your RealWear Navigator.
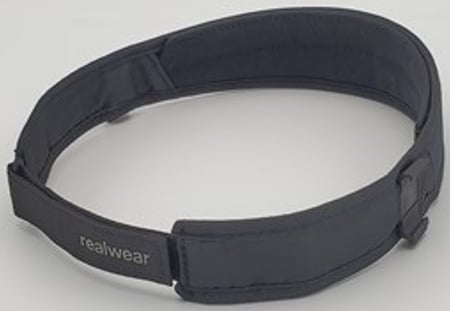
Workband
This is an adjustable Velcro strap that rests across the top front of the wearer’s head. If mounting via hard-hat or bump cap, this can be removed.
Front of Device
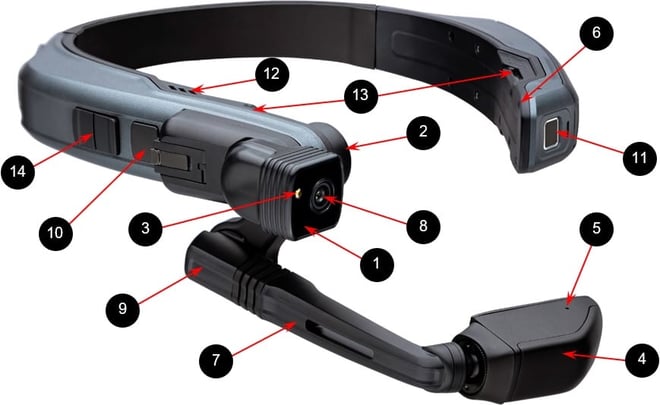
| Callout | Definition | Callout | Definition |
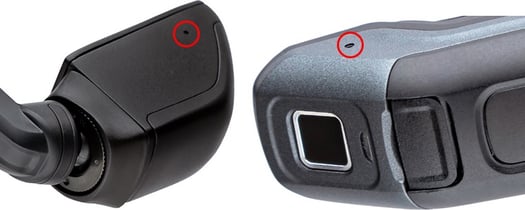
| 1 | Active camera indicator light | 8 | Camera |
| 2 | Shoulder joint | 9 | Elbow joint |
| 3 | Flashlight | 10 | Action Button |
| 4 | Display pod | 11 | Power button/fingerprint sensor |
| 5 | Mic A1 (Mic A2 opposite side) | 12 | Speaker |
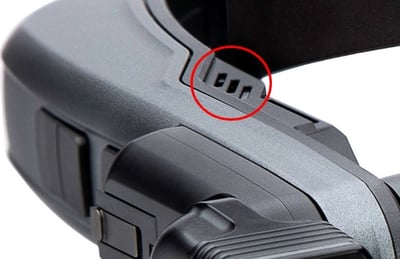
| 6 | Mic B1 (Mic B2 on opposite side) | 13 | Side accessory clipping points |
| 7 | Boom arm | 14 | Left and right buttons |
Back of Device
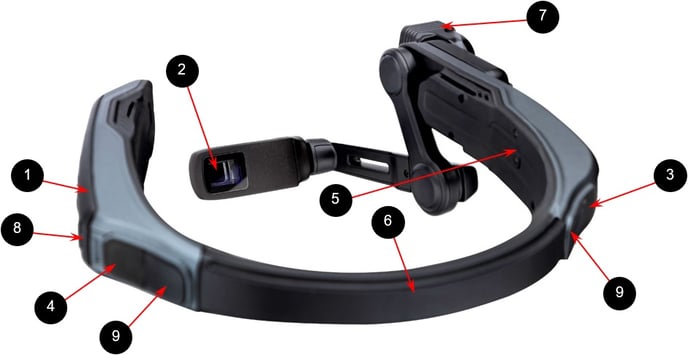
| Callout | Definition | Callout | Definition |
| 1 | Battery pack | 6 | Rear band |
| 2 | Display window | 7 | Camera module |
| 3 | 3.5 mm audio jack | 8 | Battery status indicator |
| 4 | USB-C charging port | 9 | Dust cover |
| 5 | Micro SD card slot cover |