This guide shows the general steps to scan an enrollment token (QR CODE) with a RealWear Navigator 500/520 device.
For information on creating your enrollment token/QR Code for Intune enrollment, see https://support.realwear.com/knowledge/enrolling-in-microsoft-intune
To enroll a device into your MDM/EMM tool, you must first have a valid Token from your IT organization. This is usually a large, detailed QR Code that you will scan with the device's camera at first boot or factory reset state. See above if you don't yet have your code. Token's must WPA include staging WiFi credentials. See here for more info.
Once you've received your enrollment token, you're ready to enroll.
STEP 1. Factory Reset
If your device is BRAND NEW out of box, there's no need to complete this step.
If you've used your device or previously configured it in any way, you will first need to perform a Factory Reset.
From your Home Screen,
say "MY PROGRAMS"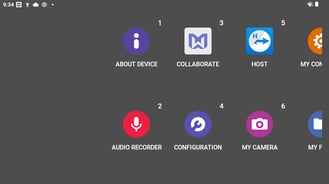
Say "SETTINGS"
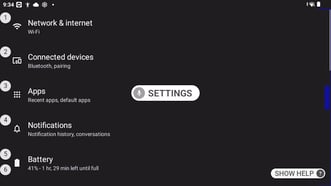
Say "PAGE DOWN" Twice
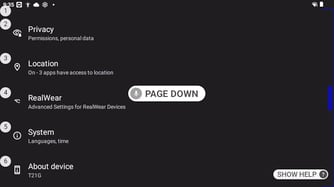
Say "SYSTEM"
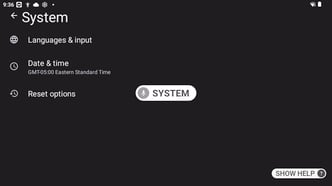
Say "RESET OPTIONS"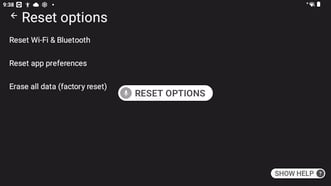
Say "ERASE ALL DATA FACTORY RESET"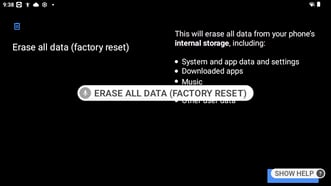
Say "ERASE ALL DATA" two times to confirm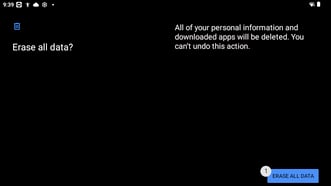
The device will now reset and reboot.
STEP 2. ENROLL DEVICE
Once the device is rebooted, it will begin to show you the initial boot animation. Upon completion of the animation, you'll be walked through a few steps on device training before we're able to scan the code to enroll the device.
When prompted, use the device's volume buttons to select your desired language, then press the large ACTION button to confirm your selection.
When you hear "Welcome to RealWear Navigator", simply say "OK LET'S GO" as seen on screen to advance.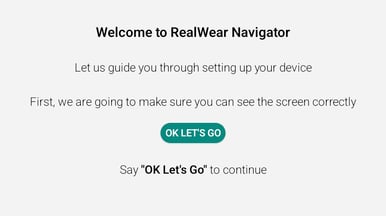
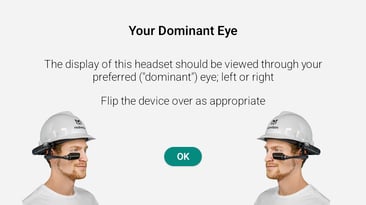
Say "OK"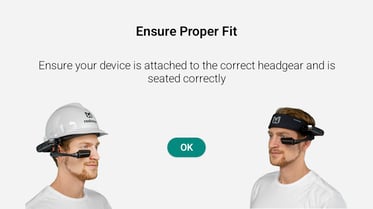
Say "OK"
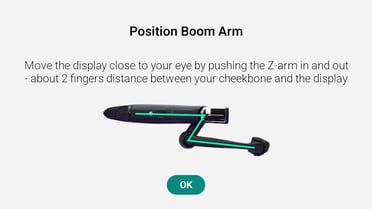
Say "OK"
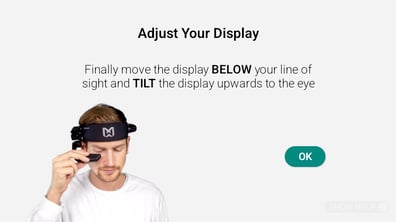
Say "OK"

Say "OK"
Say "SCAN QR CODE" and the camera view will open. You can now scan your enrollment token by centering it within your camera view. TIP: You may want to say ZOOM LEVEL 1 to zoom out/change zoom levels to assist with centering the full QR Code in view.
Once the code has been scanned, you will see this Downloading screen:
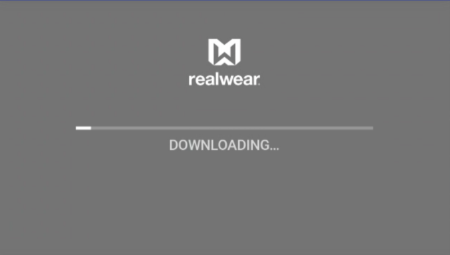
If the Download bar does not advance, re-check that all WiFi credentials were entered correctly into the code or manually configured and try again.
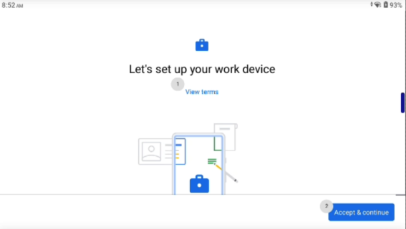
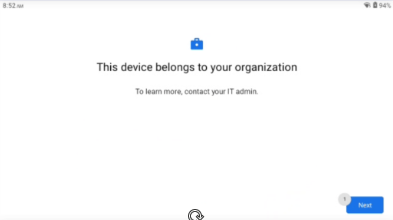
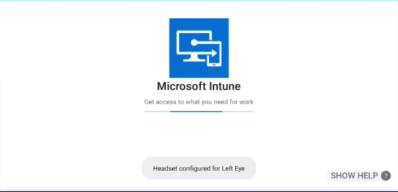
If successful, you'll be brought to the enrollment screens. Say "NEXT" or "ACCEPT & CONTINUE" as prompted to advance and completed enrollment.
Please note: Updated firmware and Android AOSP operating system have removed the ability to manually change WiFi settings prior to scanning your enrollment code. Please include WPA staging WiFi credentials into your token accordingly.
If you were provided a generic enrollment token by your Admin that is not specific to your available staging WiFi network, you can modify the QR Code here, inputting your own WPA network credentials.
By definition, a staging network should be a dedicated WPA network with ONLY an SSID and Password/Pre-Shared Key. Commonly, this may be a mobile hotspot or home WiFi network. Guest networks that require captive portal authentication or corporate networks with strict firewall rules will NOT work. Staging WiFi networks are ONLY required for initial enrollment, and can be forgotten from SAVED NETWORKS after enrollment is complete as needed.