Configuration for RealWear Devices from a QR Code
Connect to Wi-Fi Guide 2.0
There are three different methods to connect your RealWear device to a wireless network. Connecting your device to Wi-Fi is an important step to maximize your RealWear experience. A Wi-Fi connection is essential for utilizing third-party applications, performing firmware updates, and taking advantage of the features and functionalities of RealWear Cloud.
Choose the wireless network connection method that best suits you below:
Get connected directly from the device
Use this method to connect to a wireless network directly from the device. This is the simplest method for new users with a device that has not been provisioned by your IT Administrator.
Watch the How-to video
Getting Started: Connecting to Wi-Fi
You can also follow the steps below:
- From the Home Screen, say “GET CONNECTED”.
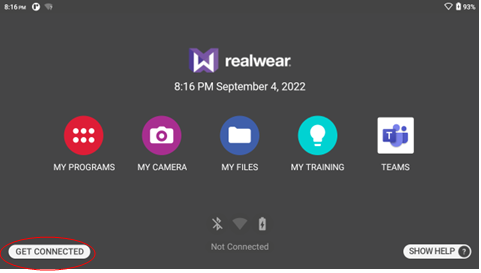
- Choose to get connected by scanning a QR code from the RealWear Companion App, or by selecting the network and entering your password with your voice.
- Download and install the RealWear Companion app from the app store
iOS: https://apps.apple.com/us/app/realwear-companion/id1224712680
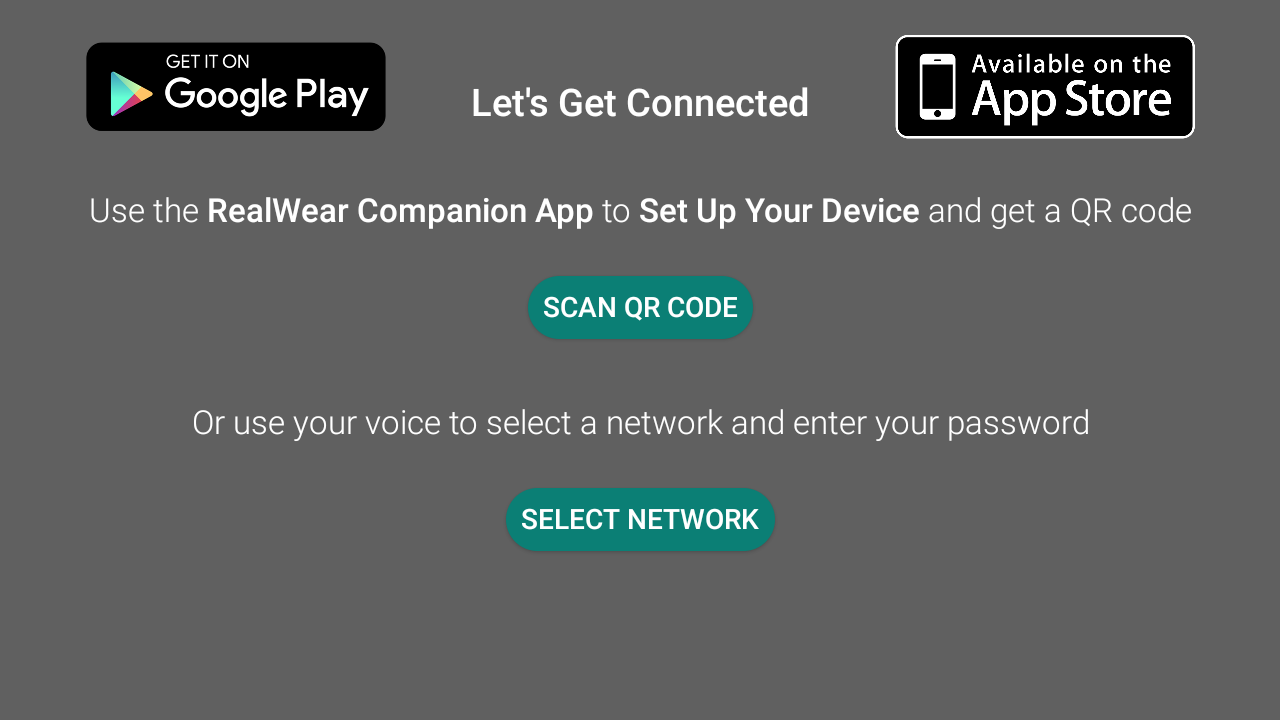
- Method 1: Scan QR Code – Set up your device and scan the code from the Companion App.
- On the Companion App, select Set Up Your Device and then select your language, set the date and time, and select Set Up Wireless Network.
- Enter the network name, security type, and password (case sensitive). Select Save.
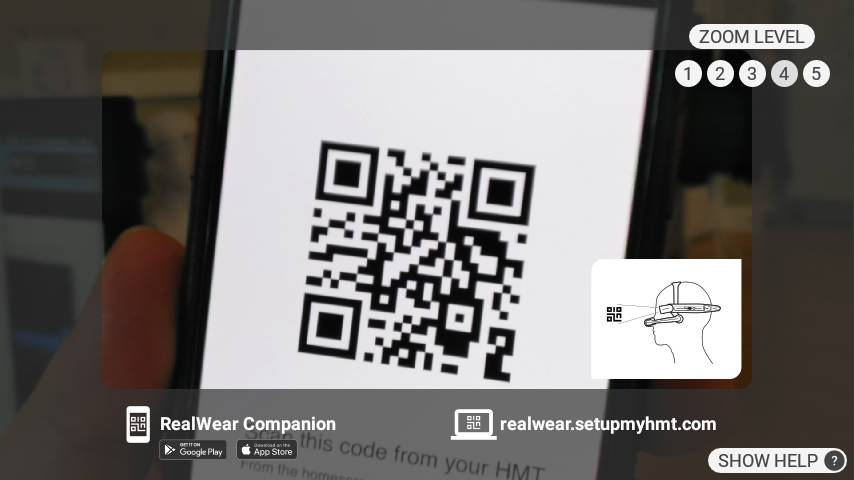
- Generate Code and say “SCAN QR CODE” to scan with the device.
- Method 2: Select Network
- Say “SELECT NETWORK”
- Say your network name or say “SELECT ITEM 3” (Use the number in the bubble next to your network).
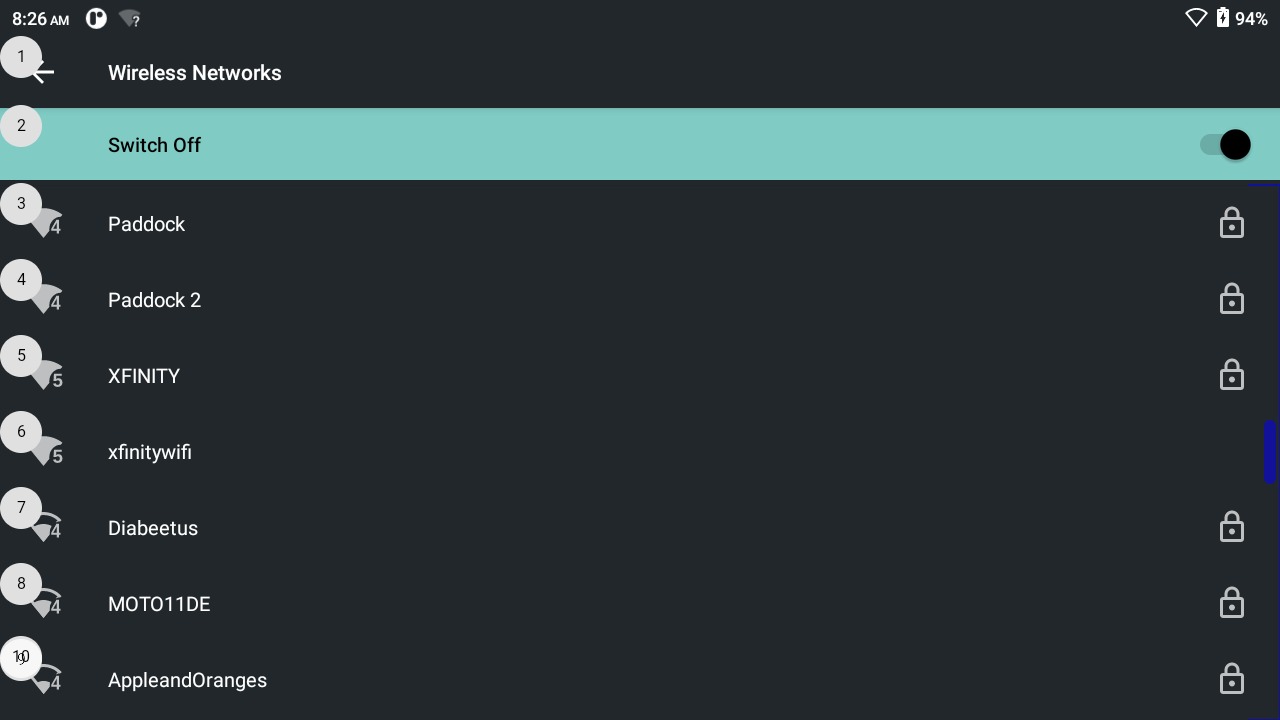
- Enter your password by saying the correct numbers, letters, and symbols.
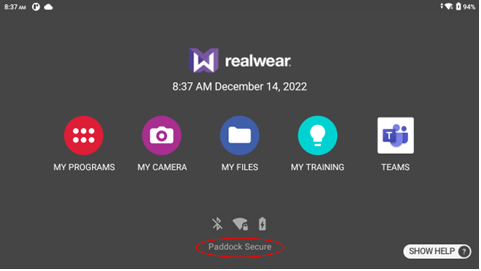
- You will see the network say “Connected” on the Wireless Networks page, and the network name will be displayed at the bottom of the home page.
Configure from the web - Connect to your wireless network by following the configuration steps on our website.
Use this method if you cannot download an external application and need to connect to Wi-Fi. This is a method for new users with a device that has not been provisioned by your IT Administrator.
- Open an internet browser on your computer.
- Visit realwear.setupmyhmt.com
- Select the desired language and click ‘Next’. You will need to select the world region first, then the time zone.
- The ‘Set Automatically’ checkbox will default to checked with the values from your computer or phone. If you desire different settings, uncheck the box and change any values necessary. Click ‘Next.’
- Enter the Wi-Fi access point name (or SSID) and password to setup the Wi-Fi network for your HMT. Note: Most simple Wi-Fi networks use WPA/WPA2 PSK security.
- Click ‘Generate Code’. A QR code will display on the computer screen.
- On the HMT open the Configuration App. Say “NAVIGATE HOME” then “MY PROGRAMS” then “CONFIGURATION”
- The device will start beeping. Scan the QR code by pointing the HMT camera so the QR code is within the target outline on the display.
- When the QR code is scanned a tone will sound and you will be returned to the previous screen.
- The network name will be displayed at the bottom of the home screen.
EMM Enrollment – IT Administrators using an EMM for their networks will provide instructions for connecting to a wireless network.
If your company has an EMM, work with your IT Administrator to receive the instructions for connecting to the wireless network.
Contact your EMM administrator for the correct QR code to enroll your device using the RealWear Configuration App. Depending on your provider your instructions will vary. For more information see our EMM support page.
Note: When you power on the RealWear device for the first time a remote configuration screen will be displayed. To skip the remote configuration and perform later, press the Action button. You may return to the configuration app at any time by saying “NAVIGATE HOME” > “MY PROGRAMS” > “CONFIGURATION”.